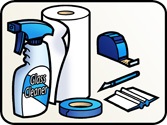
 | Tools Needed:
Two people, masking tape, squeegee, glass cleaner, paper towels, tape measure, and Exact-o knife or razorblade.
Preparation:
Using glass cleaner, thoroughly clean the windows and allow to completely dry. For best results, we recommend outside temperatures be over 65˚F with low humidity. Read instructions thoroughly.
Note: he film should be installed using certified installation spray or water for a wet installation to prevent air bubbles from occurring. |
|
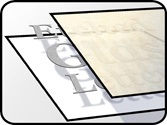 | Your Frosted Glass Decal Will Arrive With Three Layers:
- The top layer is masking tape, which holds the cut decals in place for easy installation.
- The middle layer is the Frosted Glass Film.
- The bottom layer is the white wax paper backing, which protects the frosted glass decal and the adhesive.
|
|
 | Step 1
Place the frosted glass decal on a clean, flat surface with the white wax paper backing facing you. Run a squeegee over the backing with even pressure to secure the cut material to the masking tape. |
| |
 | Step 2
Using a tape measure, measure your surface area to find the center point or desired location for installation. |
| |
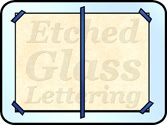 | Step 3
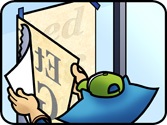
Place the entire sheet against the surface, with the masking tape facing you and the backing still on. Place a strip of masking tape down the center. Secure with tape in all four corners. |
| |
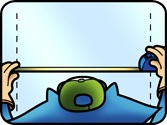
 | Step 4
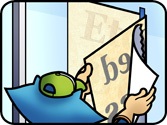
Choose one side and remove the corner tape. Gently and slowly pull away the backing at a 45˚ angle to prevent stretching or tearing. Stop when you reach the center tape line. Have a second person hold the exposed film as you use the razor blade to remove the loose paper backing.
Tip: If you do not have a razor blade, tear the top of the backing and pull it straight down, making as clean a tear as possible. |
| |
 | Step 5
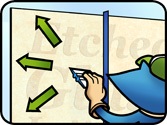
Carefully place the exposed frosted glass decal against the glass and squeegee firmly in both vertical and horizontal directions, starting from the center and working outward. The squeegee should stay in direct contact with the surface of the Frosted Glass Film as much as possible in order to prevent air bubbles. |
| |
 | Step 6
Once the first half is installed, remove all of the masking tape that you used to secure the material to the window. Lift the uninstalled material and slowly pull away the remaining backing at a 45˚ angle. |
| |
 | Step 7
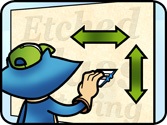
Repeat Step 5 on the remaining side of the frosted glass decal. Squeegee over the entire decal in both vertical and horizontal directions. |
| |
 | Step 8
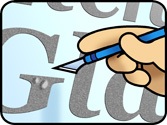
When finished, very gently peel away the top layer of masking tape at a 45˚ angle. Removing the masking tape too quickly can damage the material. |
| |
 | Step 9
You're done! Once the installation is complete, all that should remain is your custom frosted glass decal. |
|
 | Perfecting Your Frosted Glass Decal:
Most air bubbles can be pushed towards the edge and outwards. If any air bubbles remain, an Exact-o knife (or any object with a sharp point) can be used to gently punch a hole in the bubble to release the air. Gently press down with your finger. Full cure time is 4 to 8 days. Do not use any cleaning products on the surface until the decal has completely cured. |